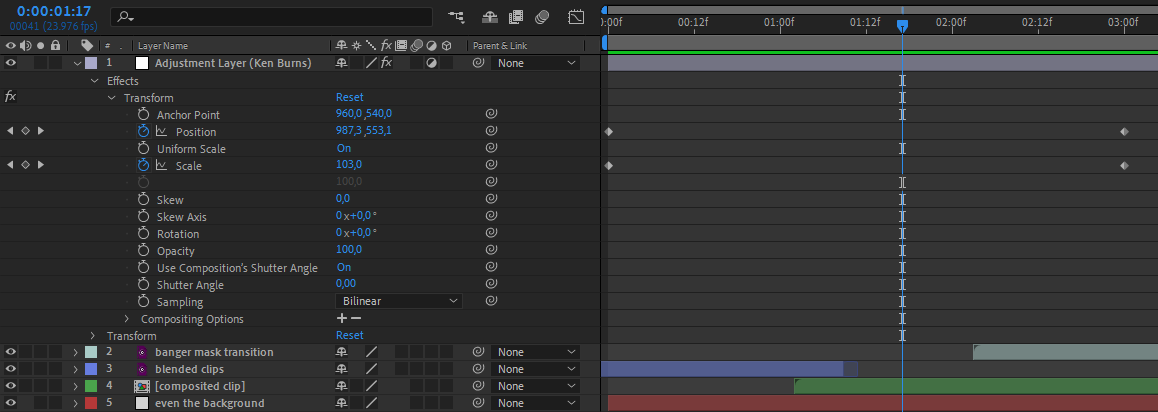
To create an adjustment layer, hit ctrl + alt + Y, this creates a white solid layer with the adjustment layer  switch set. The adjustment layer switch can be set on any layer, even ones with transparency.
Using adjustment layers
Common use cases for adjustment layers are color correction and other types of overlays, Ken Burns over complex scenes and other scenarios where you want to separate your effects from the layers you're applying them to.
Let's go over adding Ken Burns on top of an entire scene. Usually this is the easiest way to add a uniform transformation to a complex scene. A complex scene would be something that uses a lot of compositing, mask transitions or other ways to blend multiple clips together with no clear boundaries. In cases like that, you might not be able to add a scale or pan to the individual clips.

Add an adjustment layer to the composition, make sure it's on top of all of the clips you want it to affect and that it's the right length. Then add the Transform effect on it and animate  the scale. Because the Transform is on the adjustment layer, it applies to all of the layers below it.
Adjustment layer masks
Masks on adjustment layers limit their output area. A common use for this is to only apply a color correction effect on a certain section of the image.
