Setting up
First lets create the layers we need. Duplicate your base layer and label it. Find a frame where the mouth is closed and make it a freeze frame Right Click > Time > Freeze Frame (figure 2). You'll also need to mask the freeze frame so that only the mouth is visible. Lastly we need a null object to act as our anchor. Create a null object with ctrl + alt + shift + Y and label it so it's easy to find later.
Tracking
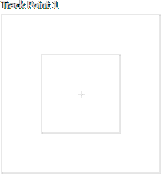
Make sure the tracker panel is open from the Window application menu. If it's already open, locate it (most likely in the right sidebar). Before we can start tracking, double click the base layer to open it in the layer panel. You can use the tabs on the preview panel to switch between the layer and composition panel. Then make sure your layer is selected and click on Track Motion in the tracker panel. It should create a motion tracker (figure 1) on the selected layer. The tracker consists of two rectangles. The larger rectangle is the search area and the smaller rectangle inside it is the detail. The cross is called the attach point.
For the tracking to work you'll need to place the detail rectangle around a preferably high contrast detail in the scene. The detail can be anything, as long as it stays on screen for the duration of the clip. Also, if you're tracking something onto a character, you should pick a detail that is on that character instead of something else like in the background. This is because if there's any parallax, the background might move at a different speed than your character. So always find a detail on the object or character you're trying to track. For this specific scene we can use the characters nose. The detail rectangle should cover the detail as close as possible but without cutting into it. It's not a bad idea to leave just a little bit of space between the edge of the rectangle and the detail itself.
The outer rectangle, the search area needs to be larger than the detail. Motion tracking in AE works by it saving a picture of the detail, then trying to find the same detail from the next frame and calculating how much it has moved. So the search area needs to cover where the detail is going to be in the next frame. You can check this by moving a single frame at a time with PgUp and PgDn. Make sure to only edit the tracker when you're on the first frame, otherwise it'll think you made a manual track for the frame you moved onto. Manual tracks are a way of correcting the tracker if it screws up but accidentally doing it just makes it not work at all.
If you know which way and how much the detail will move (which you should now that you checked) you can grow and move the search area to cover around that area (you can move the search area by clicking and dragging the very edge of it). The smaller you can make the area the faster the search but the same search area will be used for every frame, so you shouldn't make it too small if the movement is erratic or it'll miss where the detail moved. And you shouldn't make the search area too large or AE can hit a false positive and start tracking something that it thinks looks like the detail but is actually a completely different set of pixels. After setting up the detail and search area, you can click on the triangle "track forwards" in the tracker panel button and AE will track from the current frame to the end of the clip.
In my case the track failed at the end since the nose of the character deformed a little and the animation completely changed too. If this happens, you can manually adjust the detail (and search area) on any frame and continue tracking from that frame with the adjusted detail. For now I'll just not track the last bit where she looks up, since that would require a separate tracker or most likely some manual labor.
To apply the track, click on Edit Target and find the null from the list. Then click Apply, use X and Y and click OK. The null should now be attached to the detail we tracked. To attach the mouth to the track too, find the frame where the freeze frame was taken (hint, press U to show the keyframes). Preview that frame (move your playhead to it) and  pickwhip the freezeframe layer to the null layer. The mouth should now follow the tracker as it's parented to the null. You can also parent anything you want to the null to make it follow the character we tracked. Like silly glasses or a hat. Go wild. Go stupid. Go absolutely positively bonkers.